
How to plan a route to a destination
There are three entry points to plan a route from the Start Screen:

- Drop a pin by a simple tap or long-press anywhere on the map - then instantly drag it to the correct location! This is a good option if you want to plan visually on a map and when you don’t have a specific destination in mind.
- Search for a destination in the search bar. This is the fastest option to generate a route if you have a specific place in mind.
- Tap the Plan Route button. This will open up the itinerary list where you could add several destinations on a route.
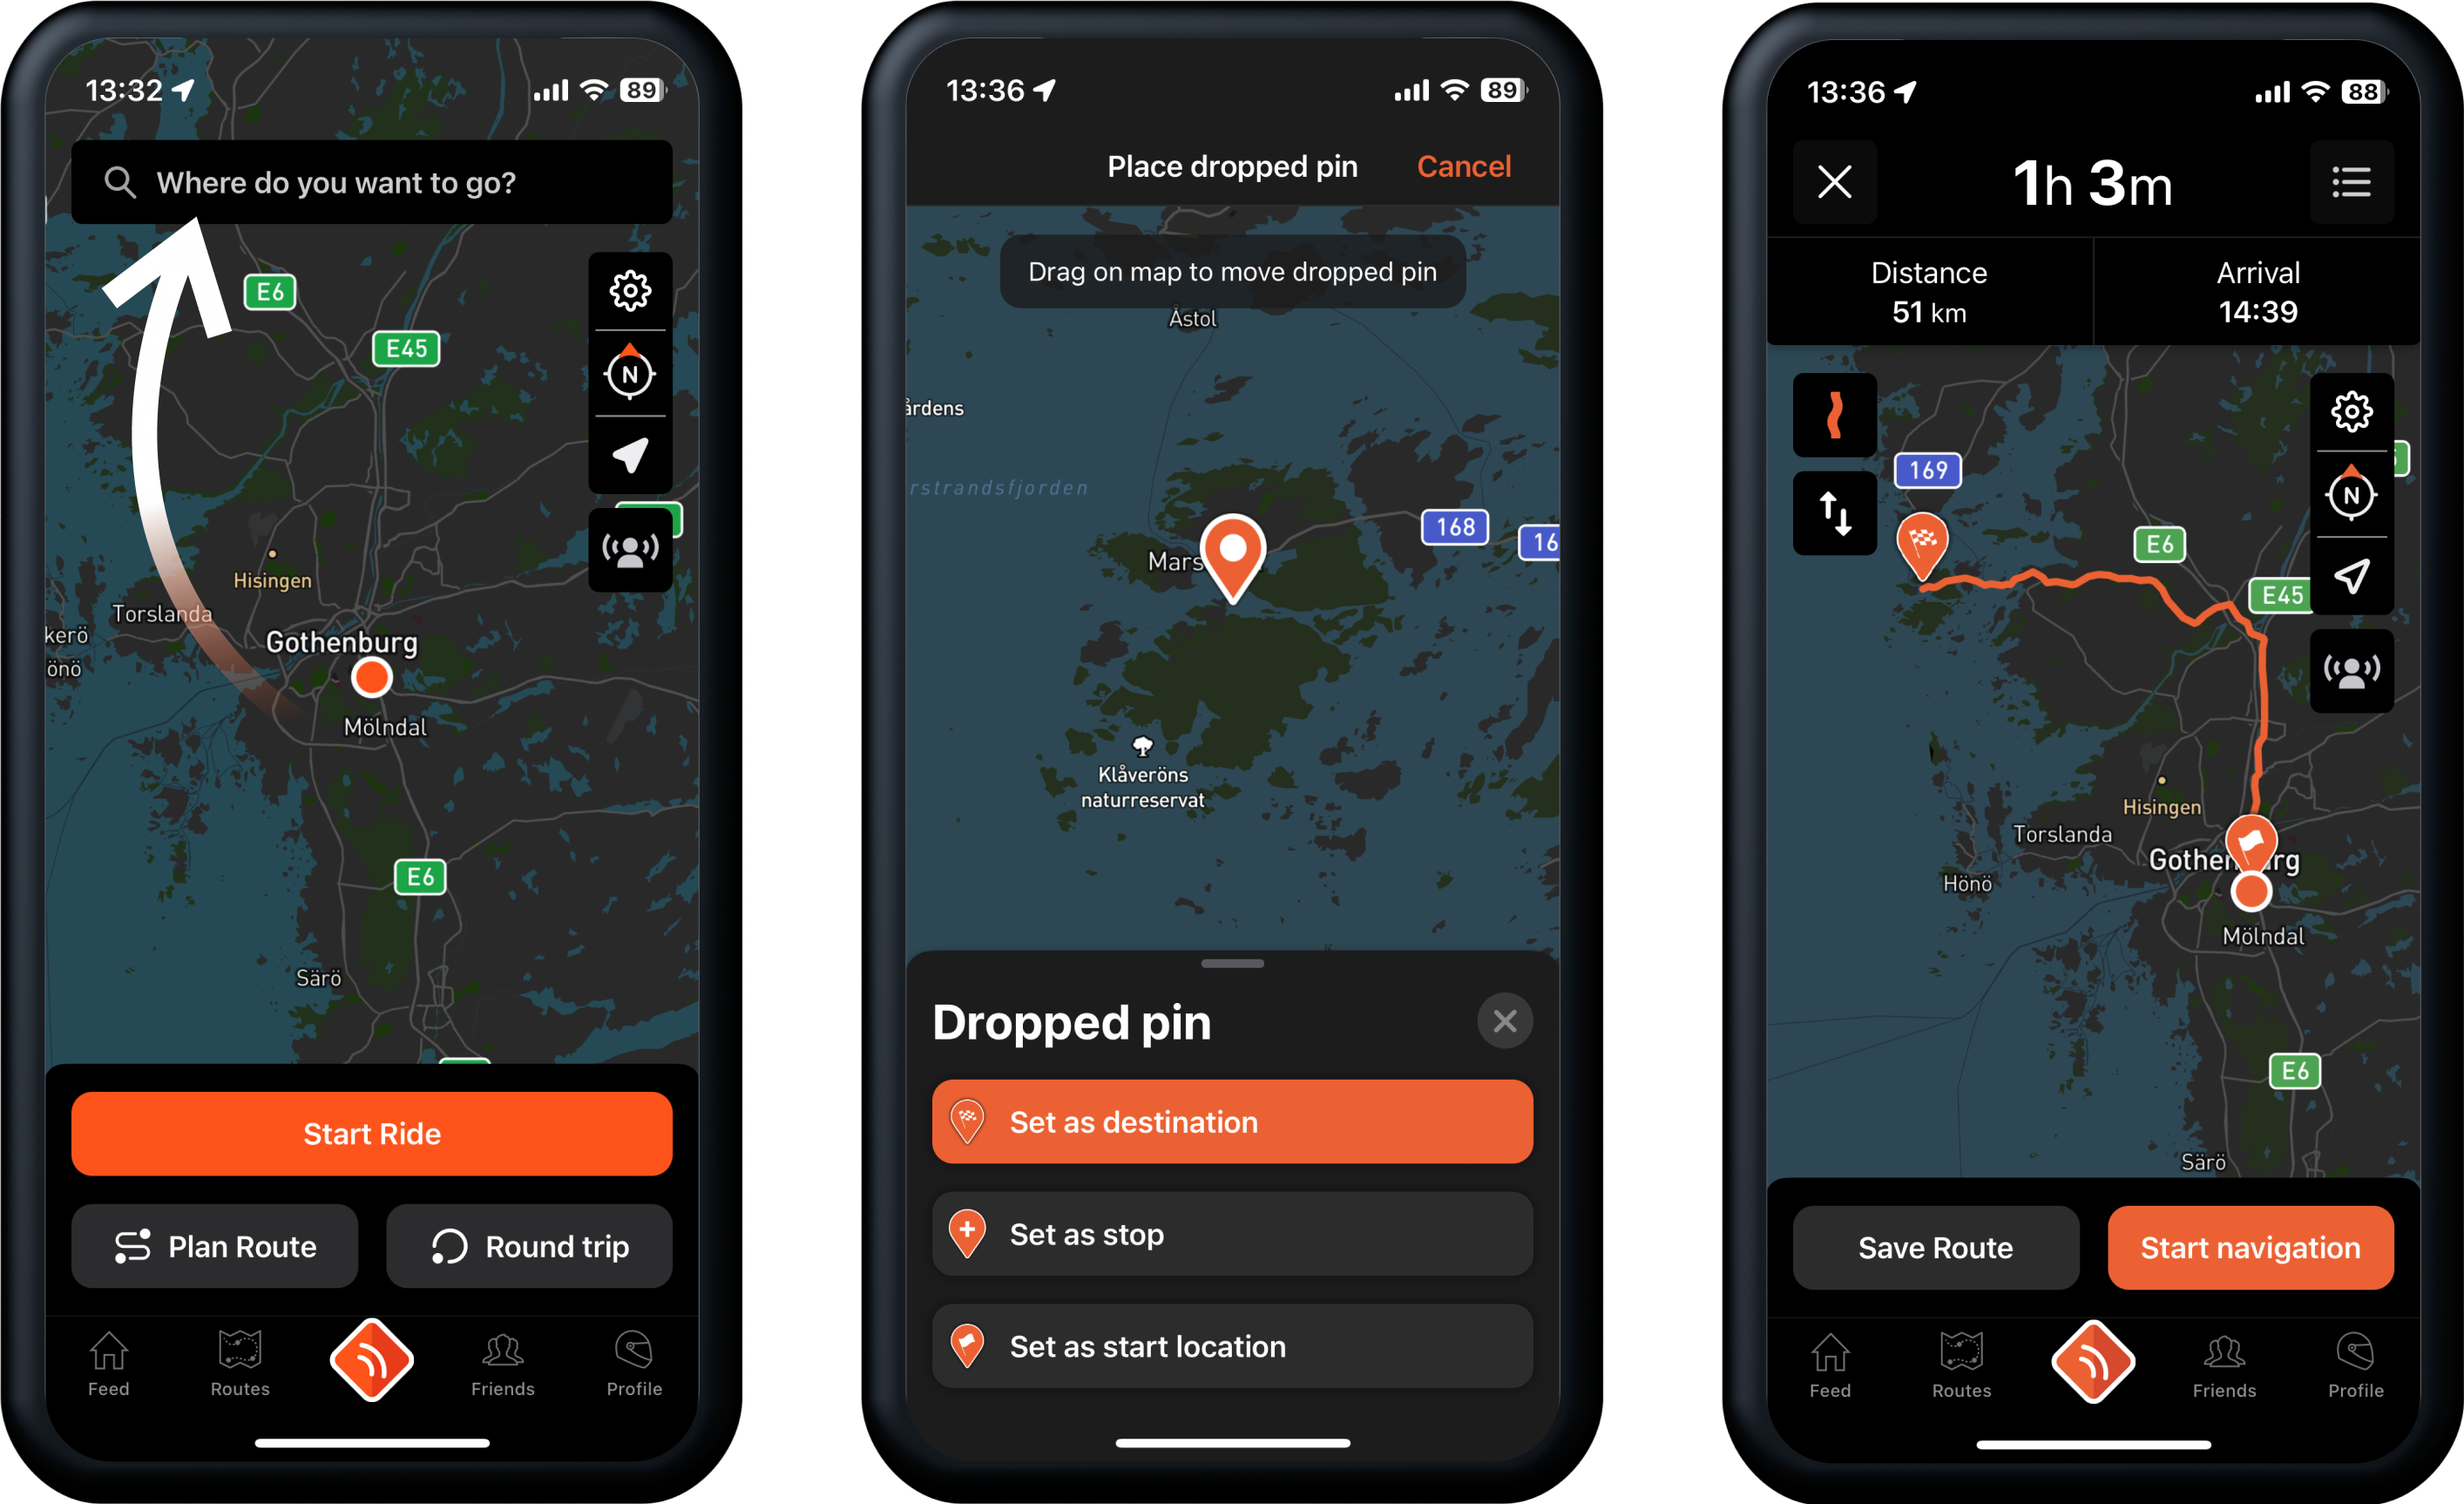
Create a route directly on the map

- In the Start Screen, tap directly on the map at your desired location. (You can also use long-press to do this. (Long-pressing: Holding down your finger at the screen until an action is performed.))
- This will drop a pin on the map that you can move into the correct position.
- Once you have moved the pin to the desired location choose from one of the following choices: Set as Destination / Set as Stop / Set as Start Location.
- By choosing Set as Destination, a route will be generated from your current position to your chosen location.
Create a route by searching for a destination
- In the Start Screen, tap "Where do you want to go?"
- Search for your destination and choose it from the list.
- You'll now have a pin in that location that you can move into the correct position or just select Set as destination directly.
- By choosing Set as Destination, a route will be generated from your current position to your chosen location.
Create a route with multiple stops to a destination
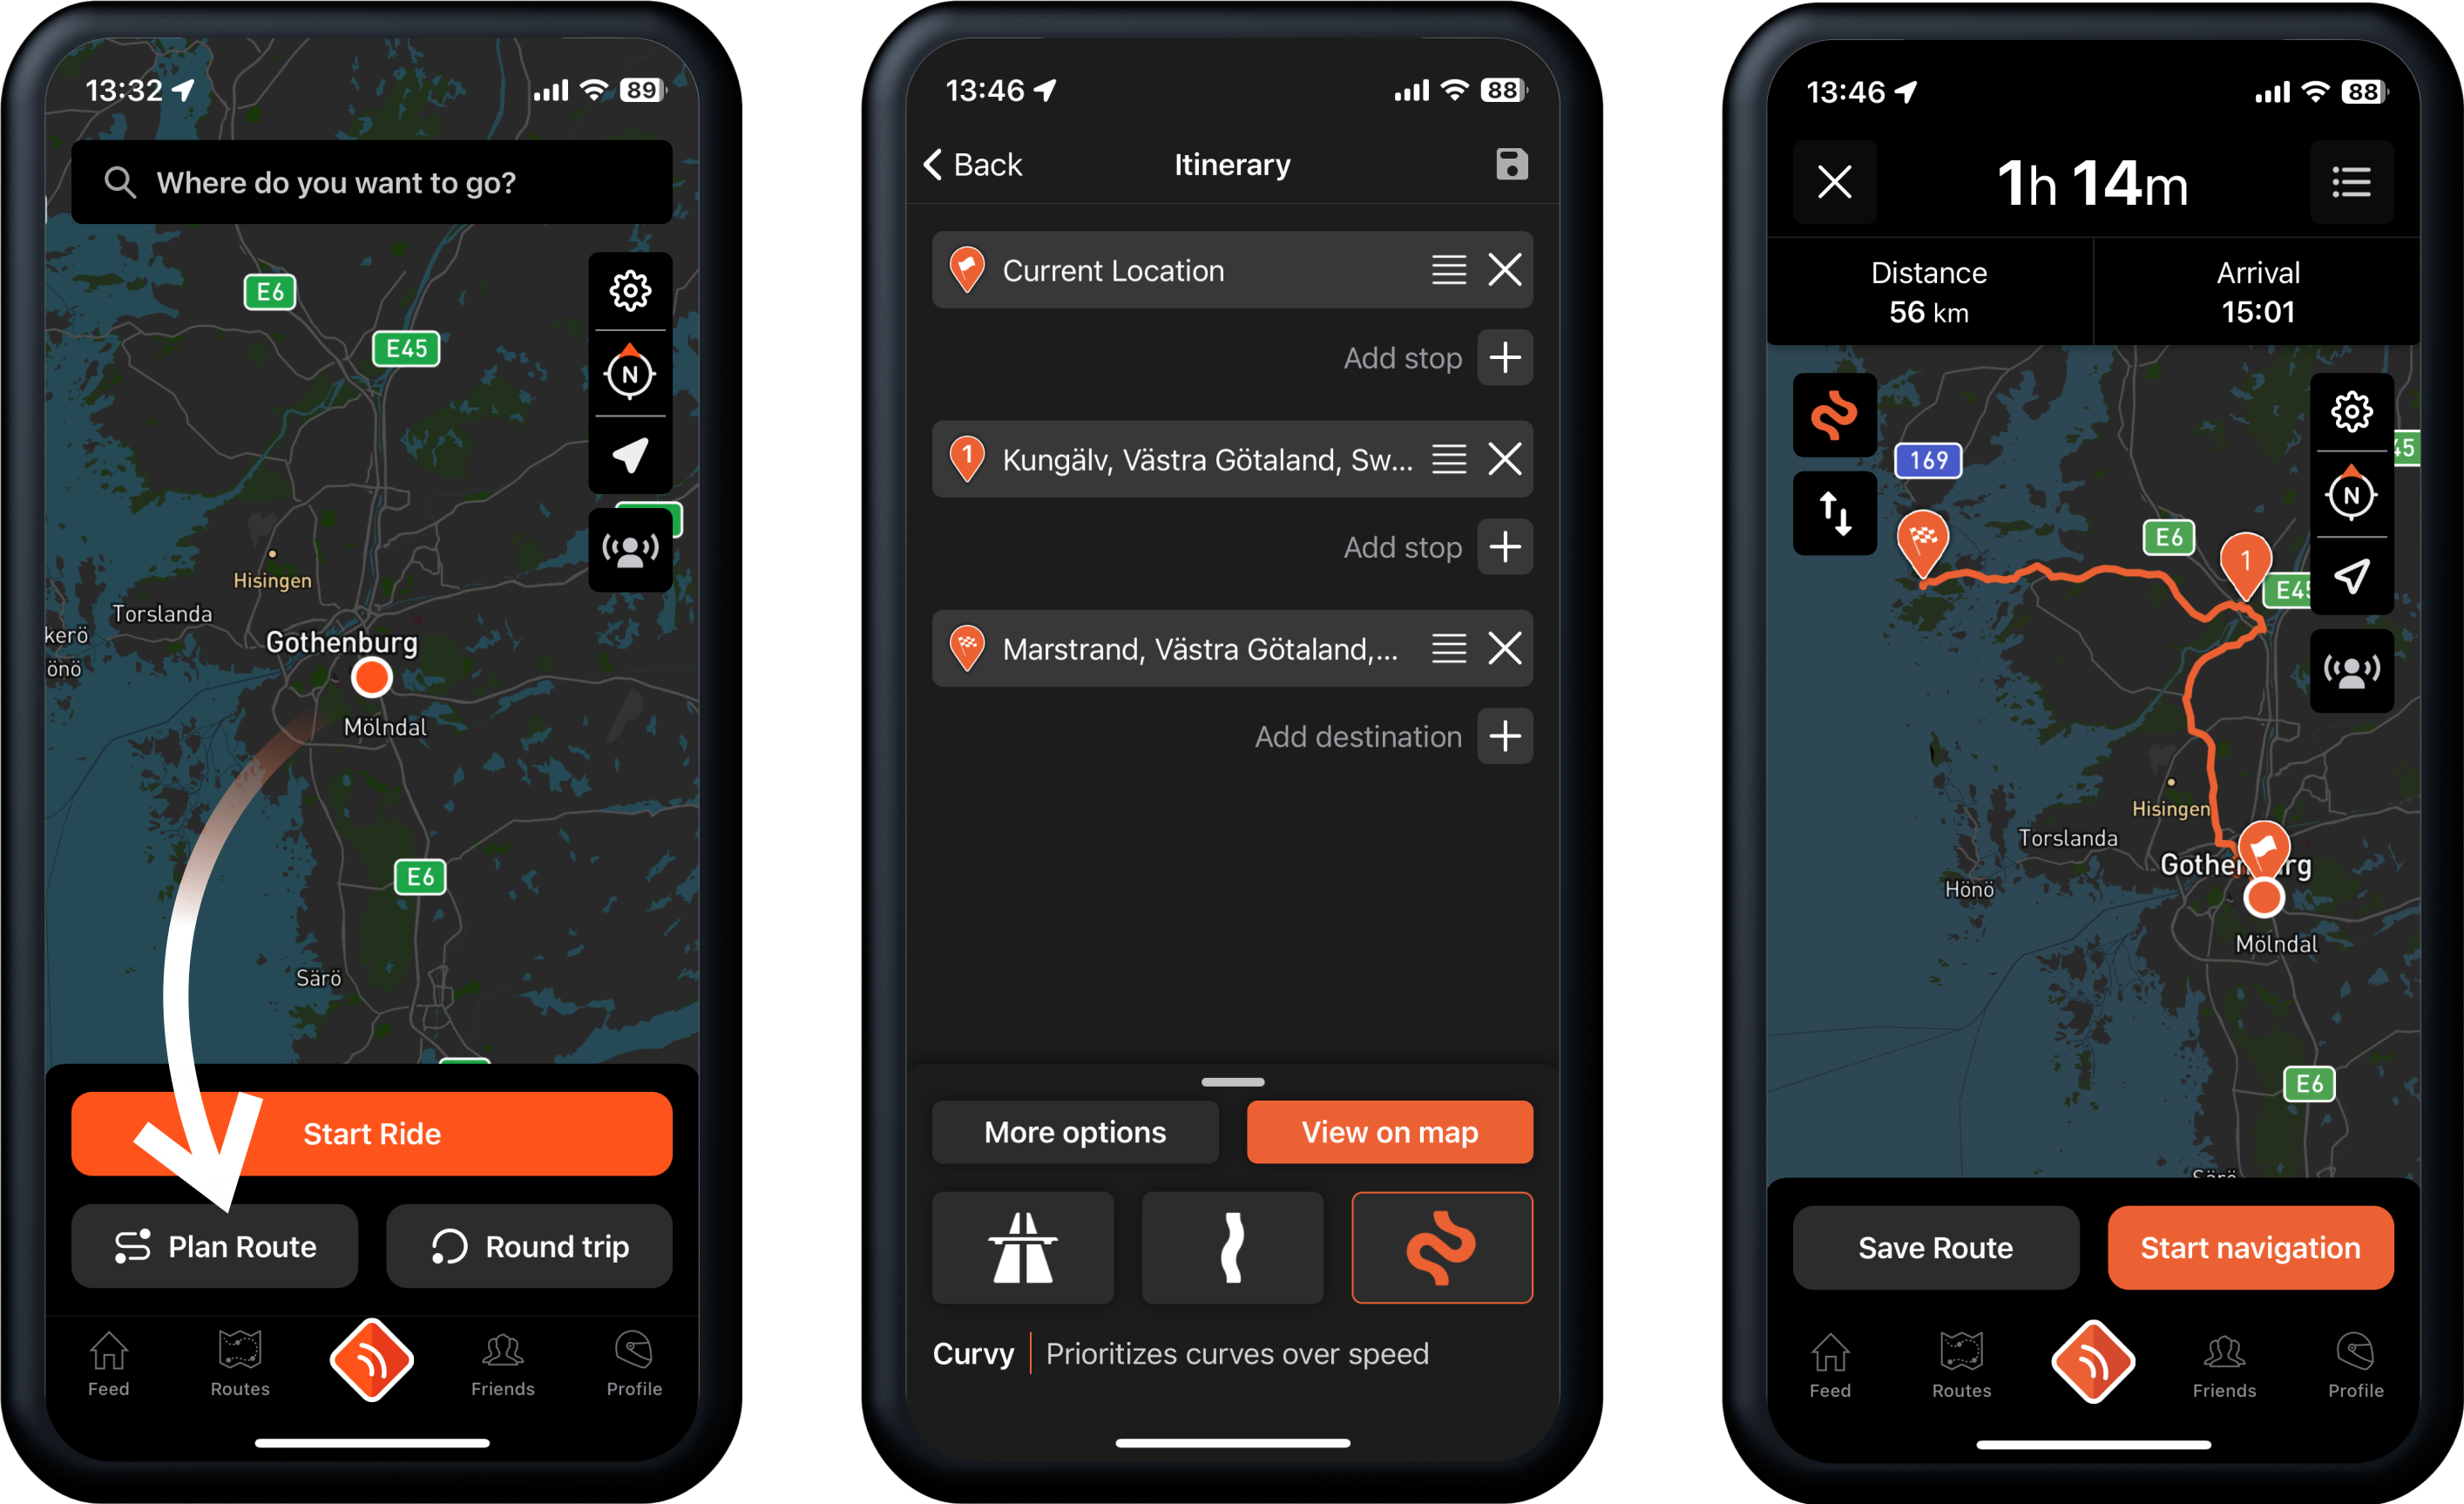
- In the Start Screen, tap "Plan Route".
- Here you can add all destinations on your route at once.
- Once you've added all your destinations tap View on map.
How to change road type (curvature)
Once a route has been generated you will have the option to change between 3 road types:
- Fast - This option aims to guide you to your destination the fastest way possible, which will mostly include highways.
- Avoid Highway - Will avoid any highways and guide you on less trafficked roads.
- Curvy - This road option prioritizes finding the most curvy roads to your destination.
The Curvy road type is a Premium feature. You can read more about Premium and how to upgrade here.
You can easily switch between the different road types by either:
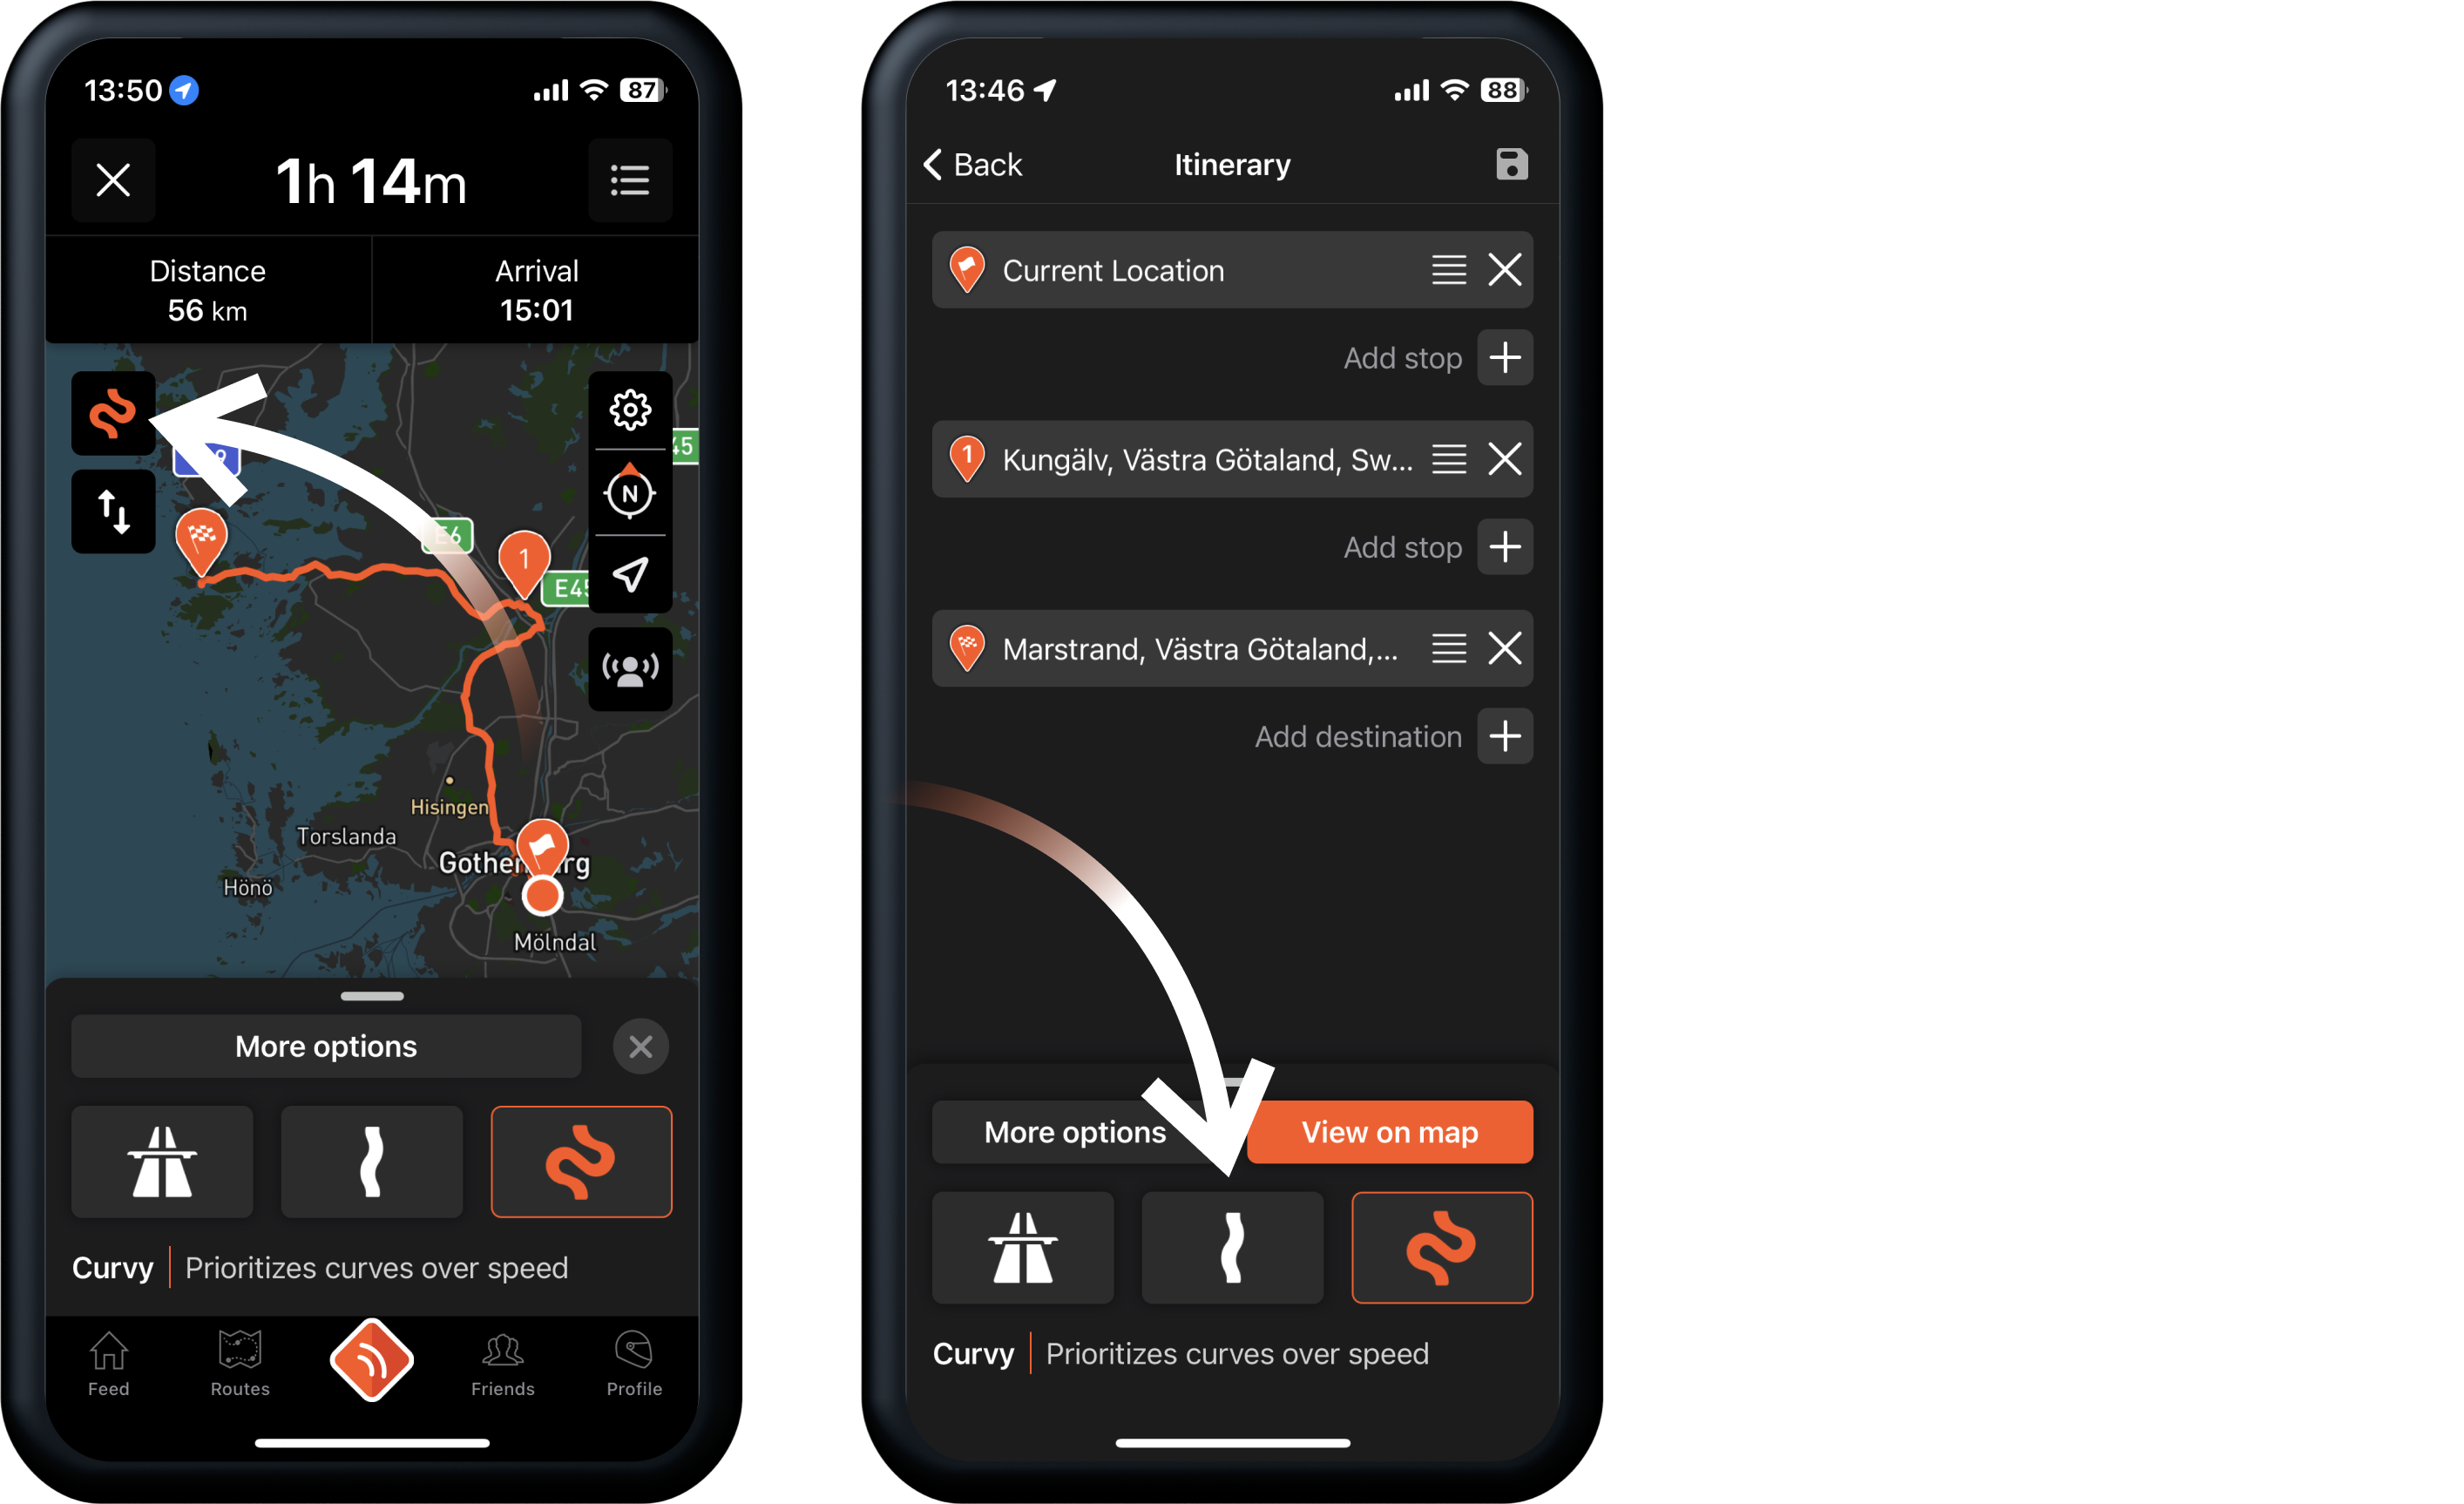
- Tapping the road type icon directly on the map which opens the road type menu.
- In the itinerary list, select your preferred road type and tap View on map or Back.
How to add Stops
Adding additional Stops is done by either:
- Tap or long-press anywhere on the map and choose Set as Stop.
- Add Stops in the itinerary list by searching for a specific location.
Adding Stops on the map

- Tap or long-press anywhere on the map - then drag the dropped pin to the desired location.
- Choose Set as Stop to add this location as a Stop on your route.
Moving waypoints on the map
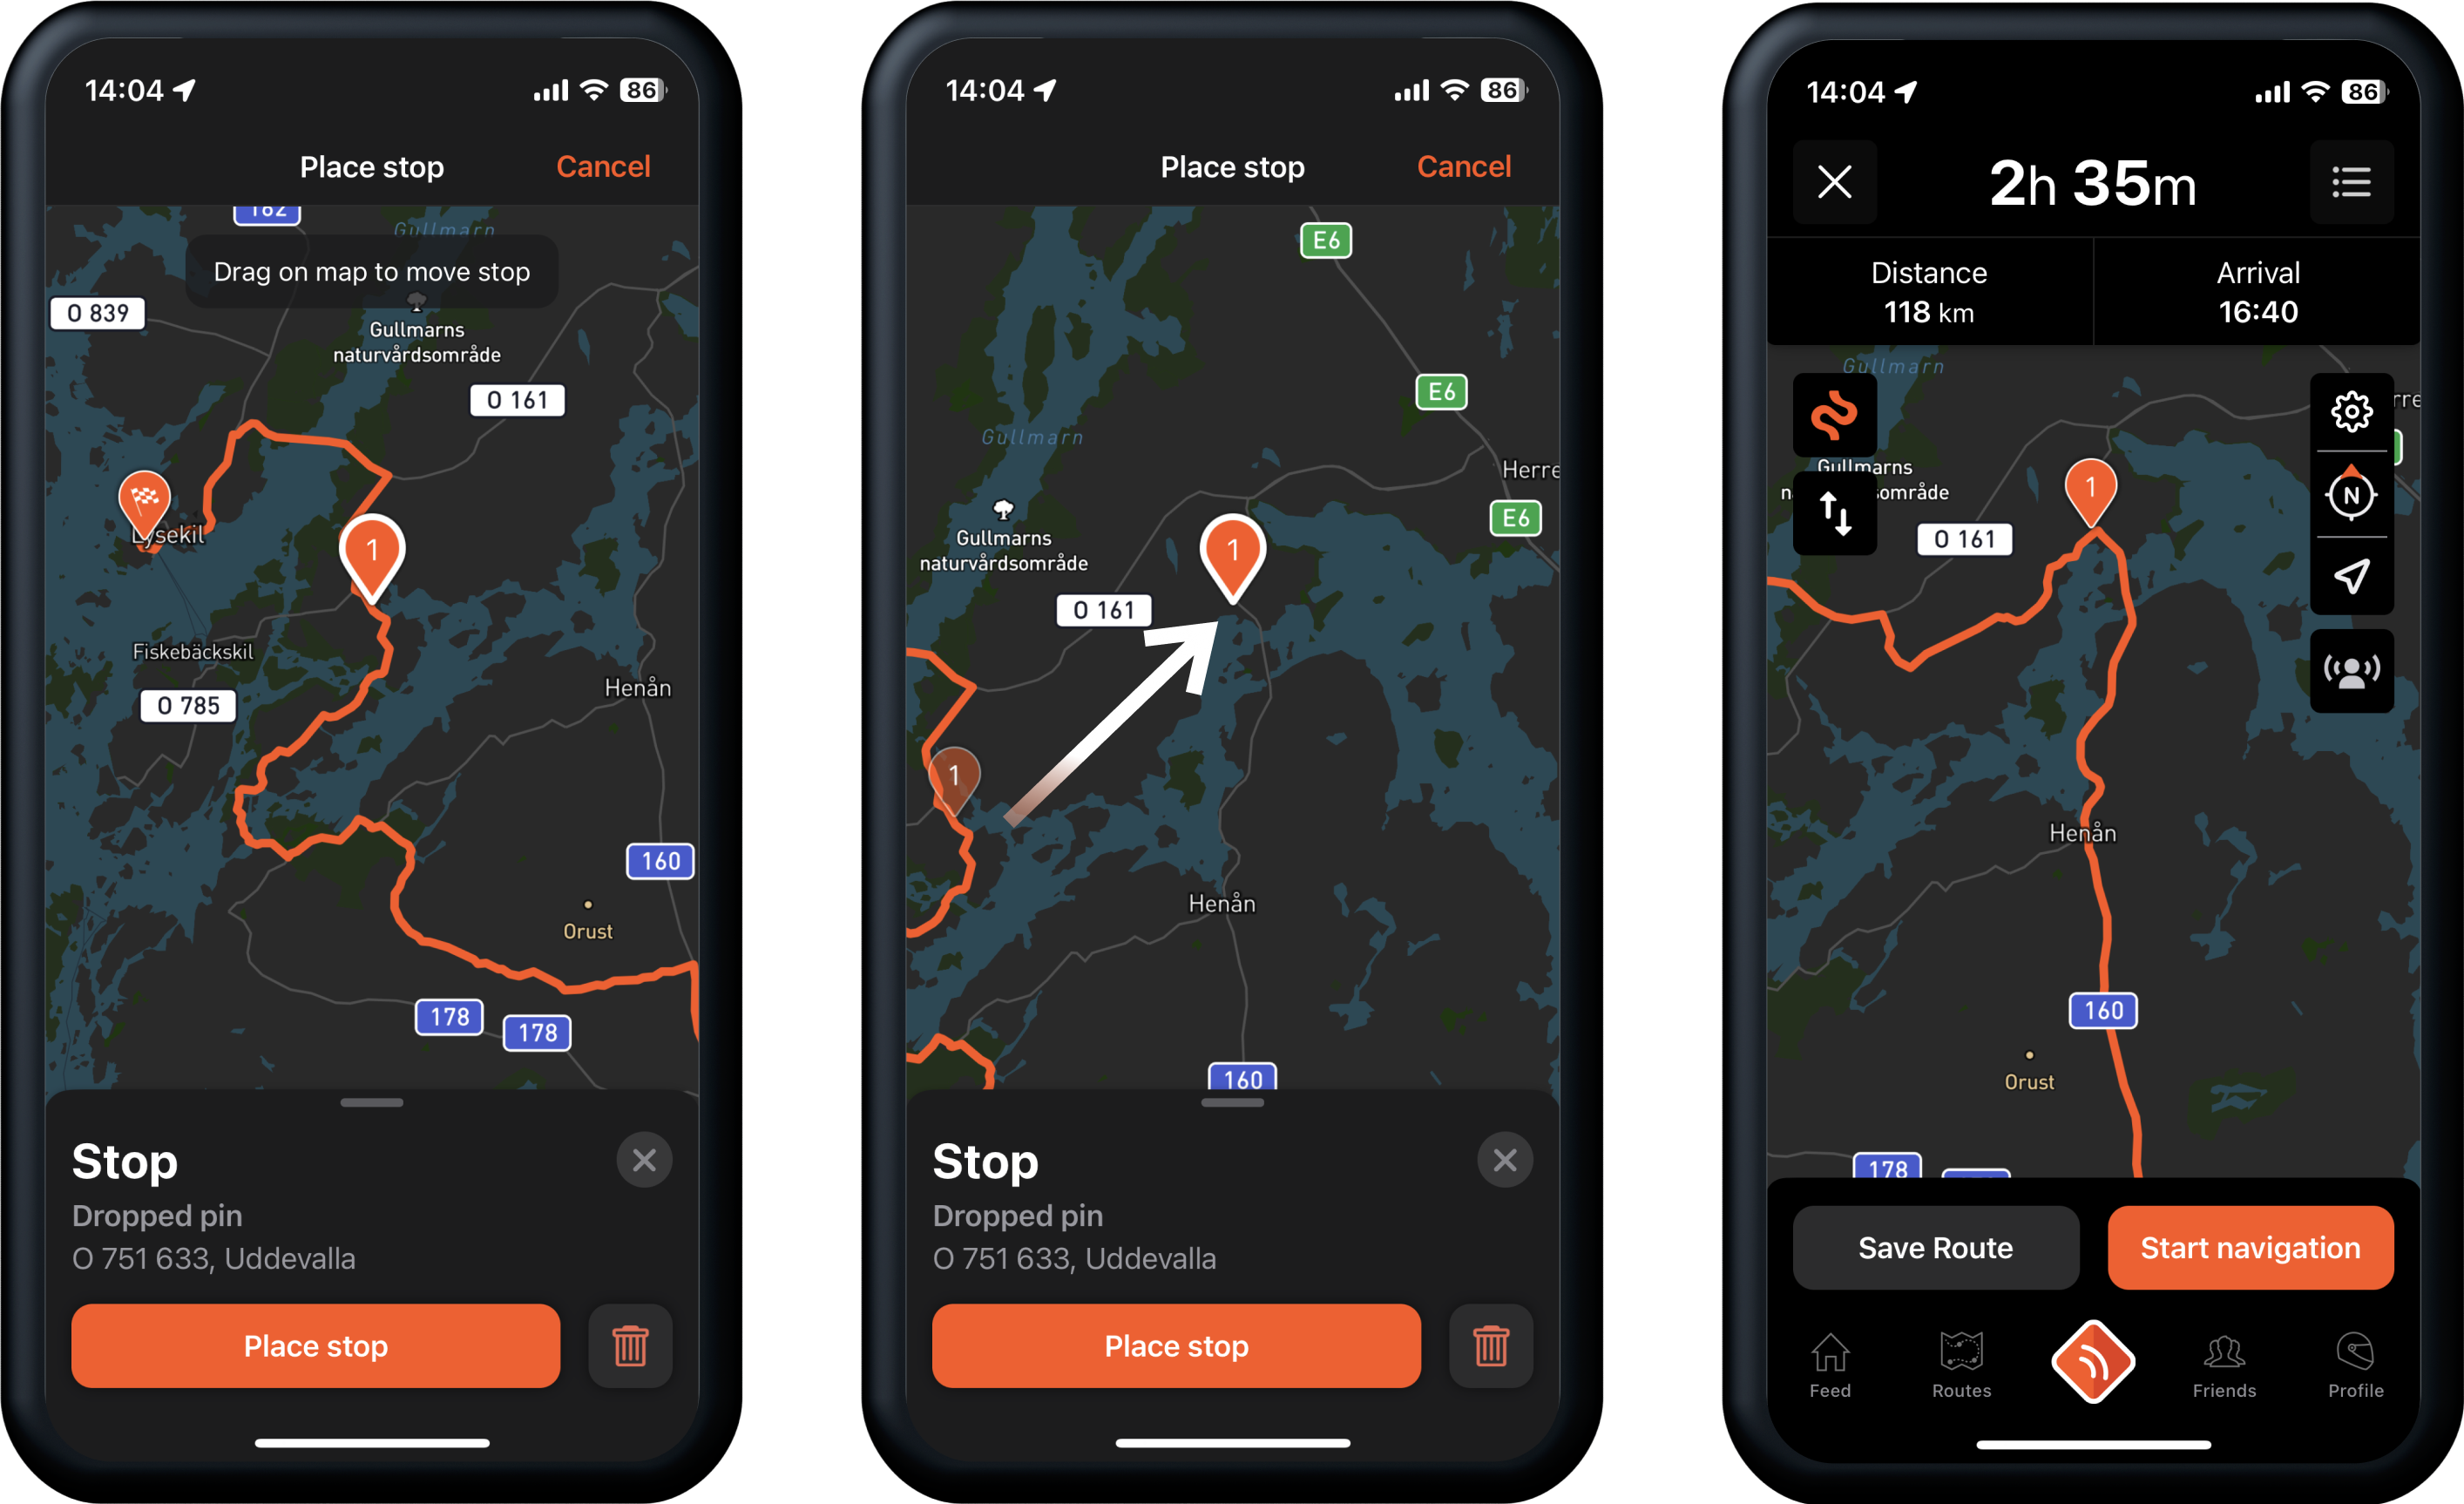
- Tap on a waypoint you want to move. (This could be a Stop/Destination/Start location)
- Move it to the new location by dragging or zooming the map.
- Tap the button Place Stop (or destination/start location if you selected one of those waypoints).
Adding Stops in the itinerary list
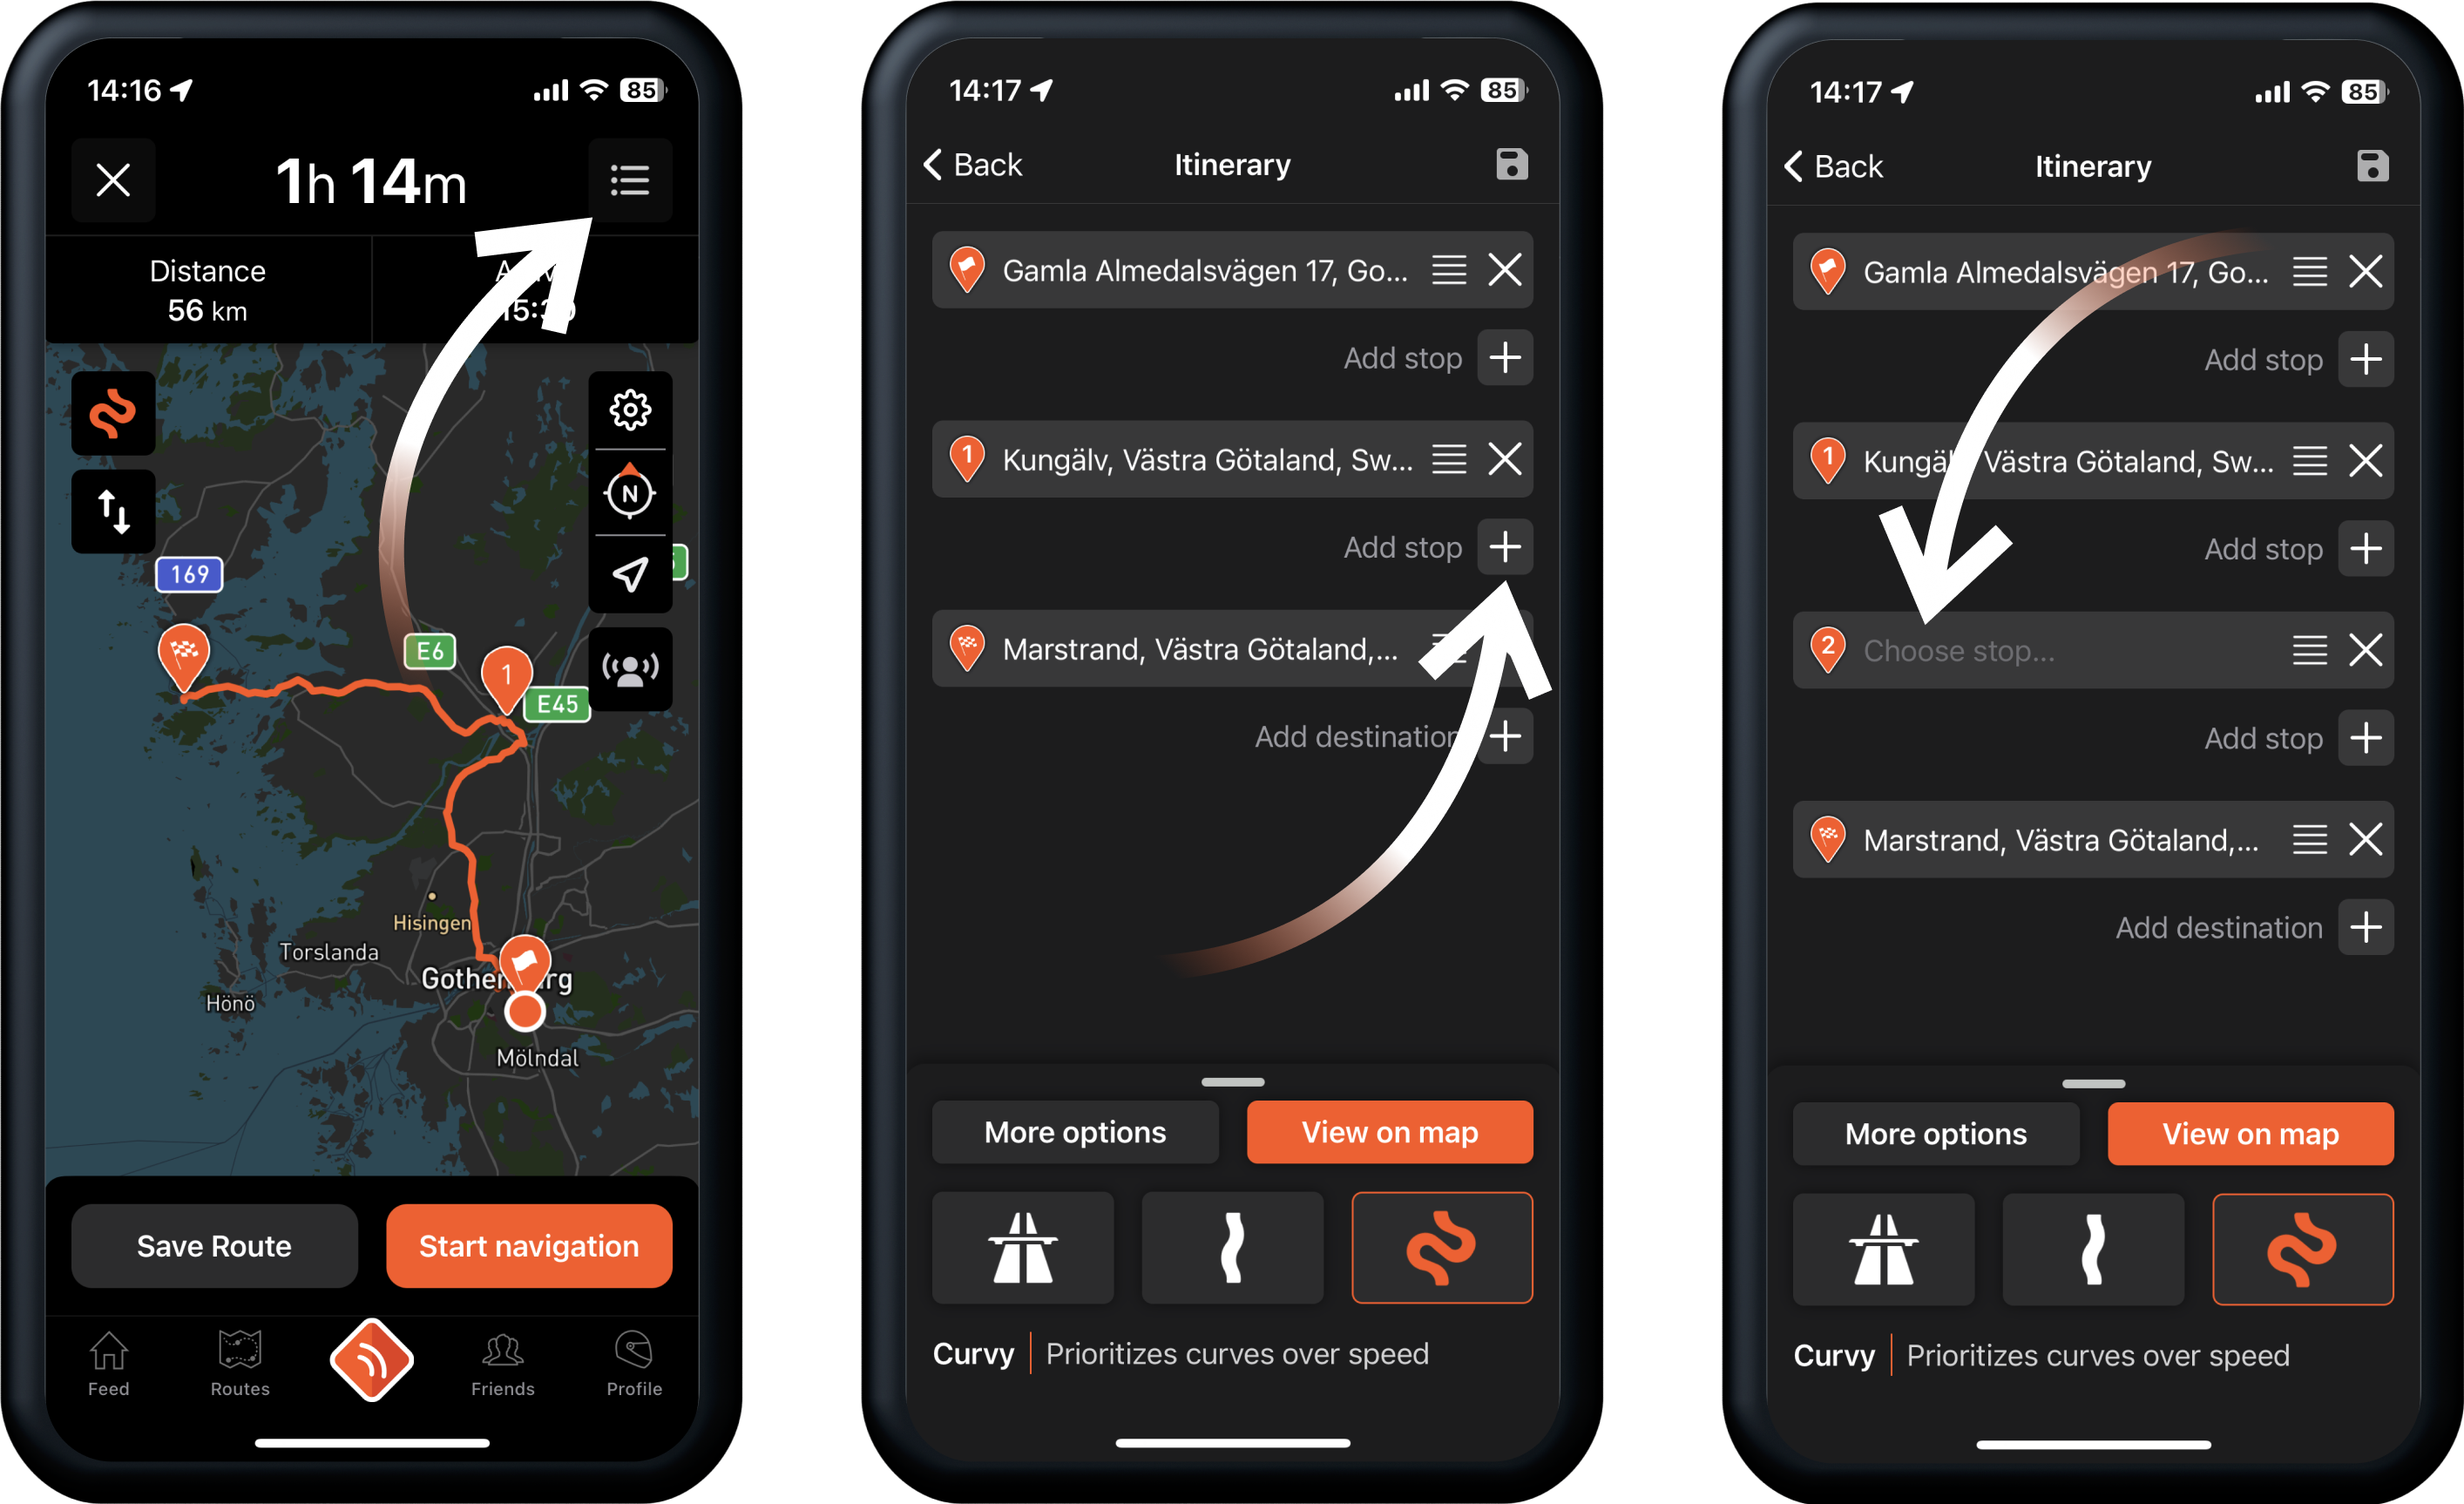
- If you are not already in the itinerary list, navigate to it by tapping the itinerary list icon in the top right corner.
- Tap the Add Stop [+] icon in between the two locations that you would like to place a Stop.
- Tap the new “Choose stop...” field and search for a specific location.
- Tap View on map.
Rearranging waypoints in the itinerary list

You can rearrange the order of your waypoints in the list by long-pressing on the drag handle icon of a waypoint and drag and drop it where you want it.
How to generate a Round Trip
The Round Trip generator is a Premium feature. You can read more about Premium and how to upgrade here.
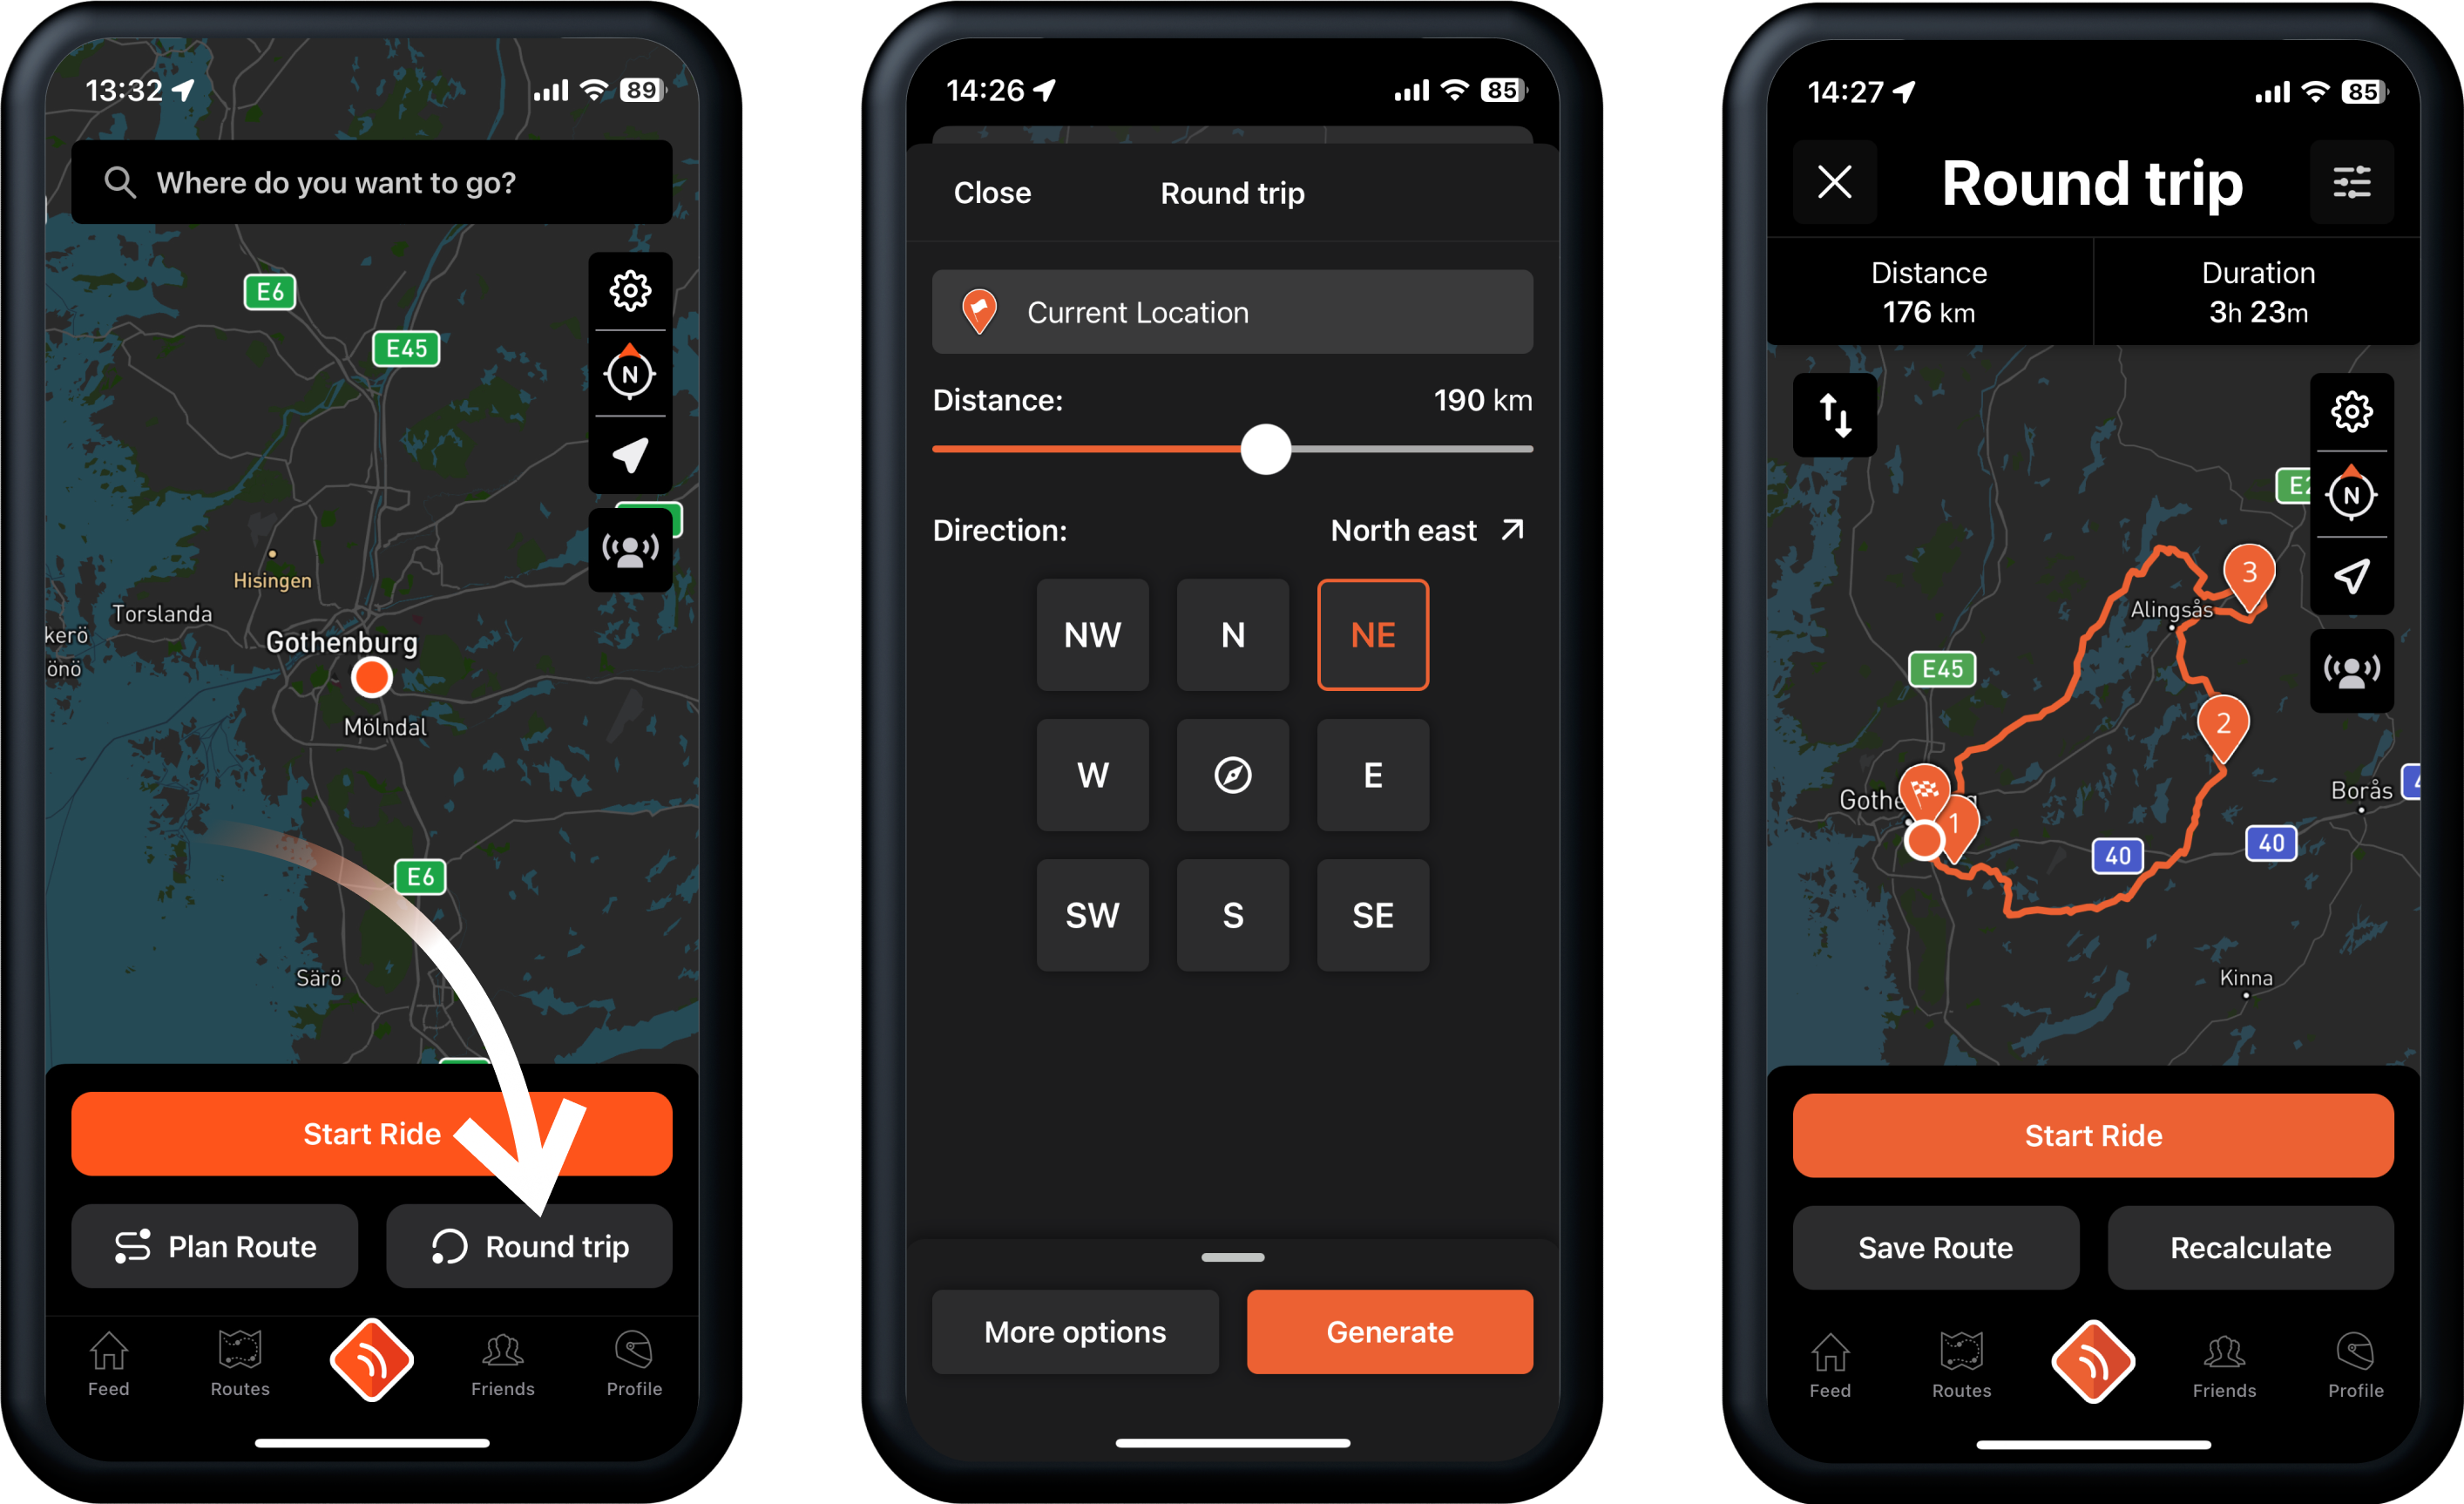
- From the Start Screen, tap Round Trip.
- Set your preferences such as distance and direction and tap Generate.
- You have now generated a Round Trip on curvy roads. Tap Recalculate until you are happy with the result.
How to save a planned route
Once you have finished planning a route in the app you can save it to have it stored in the app for when you are about to ride.
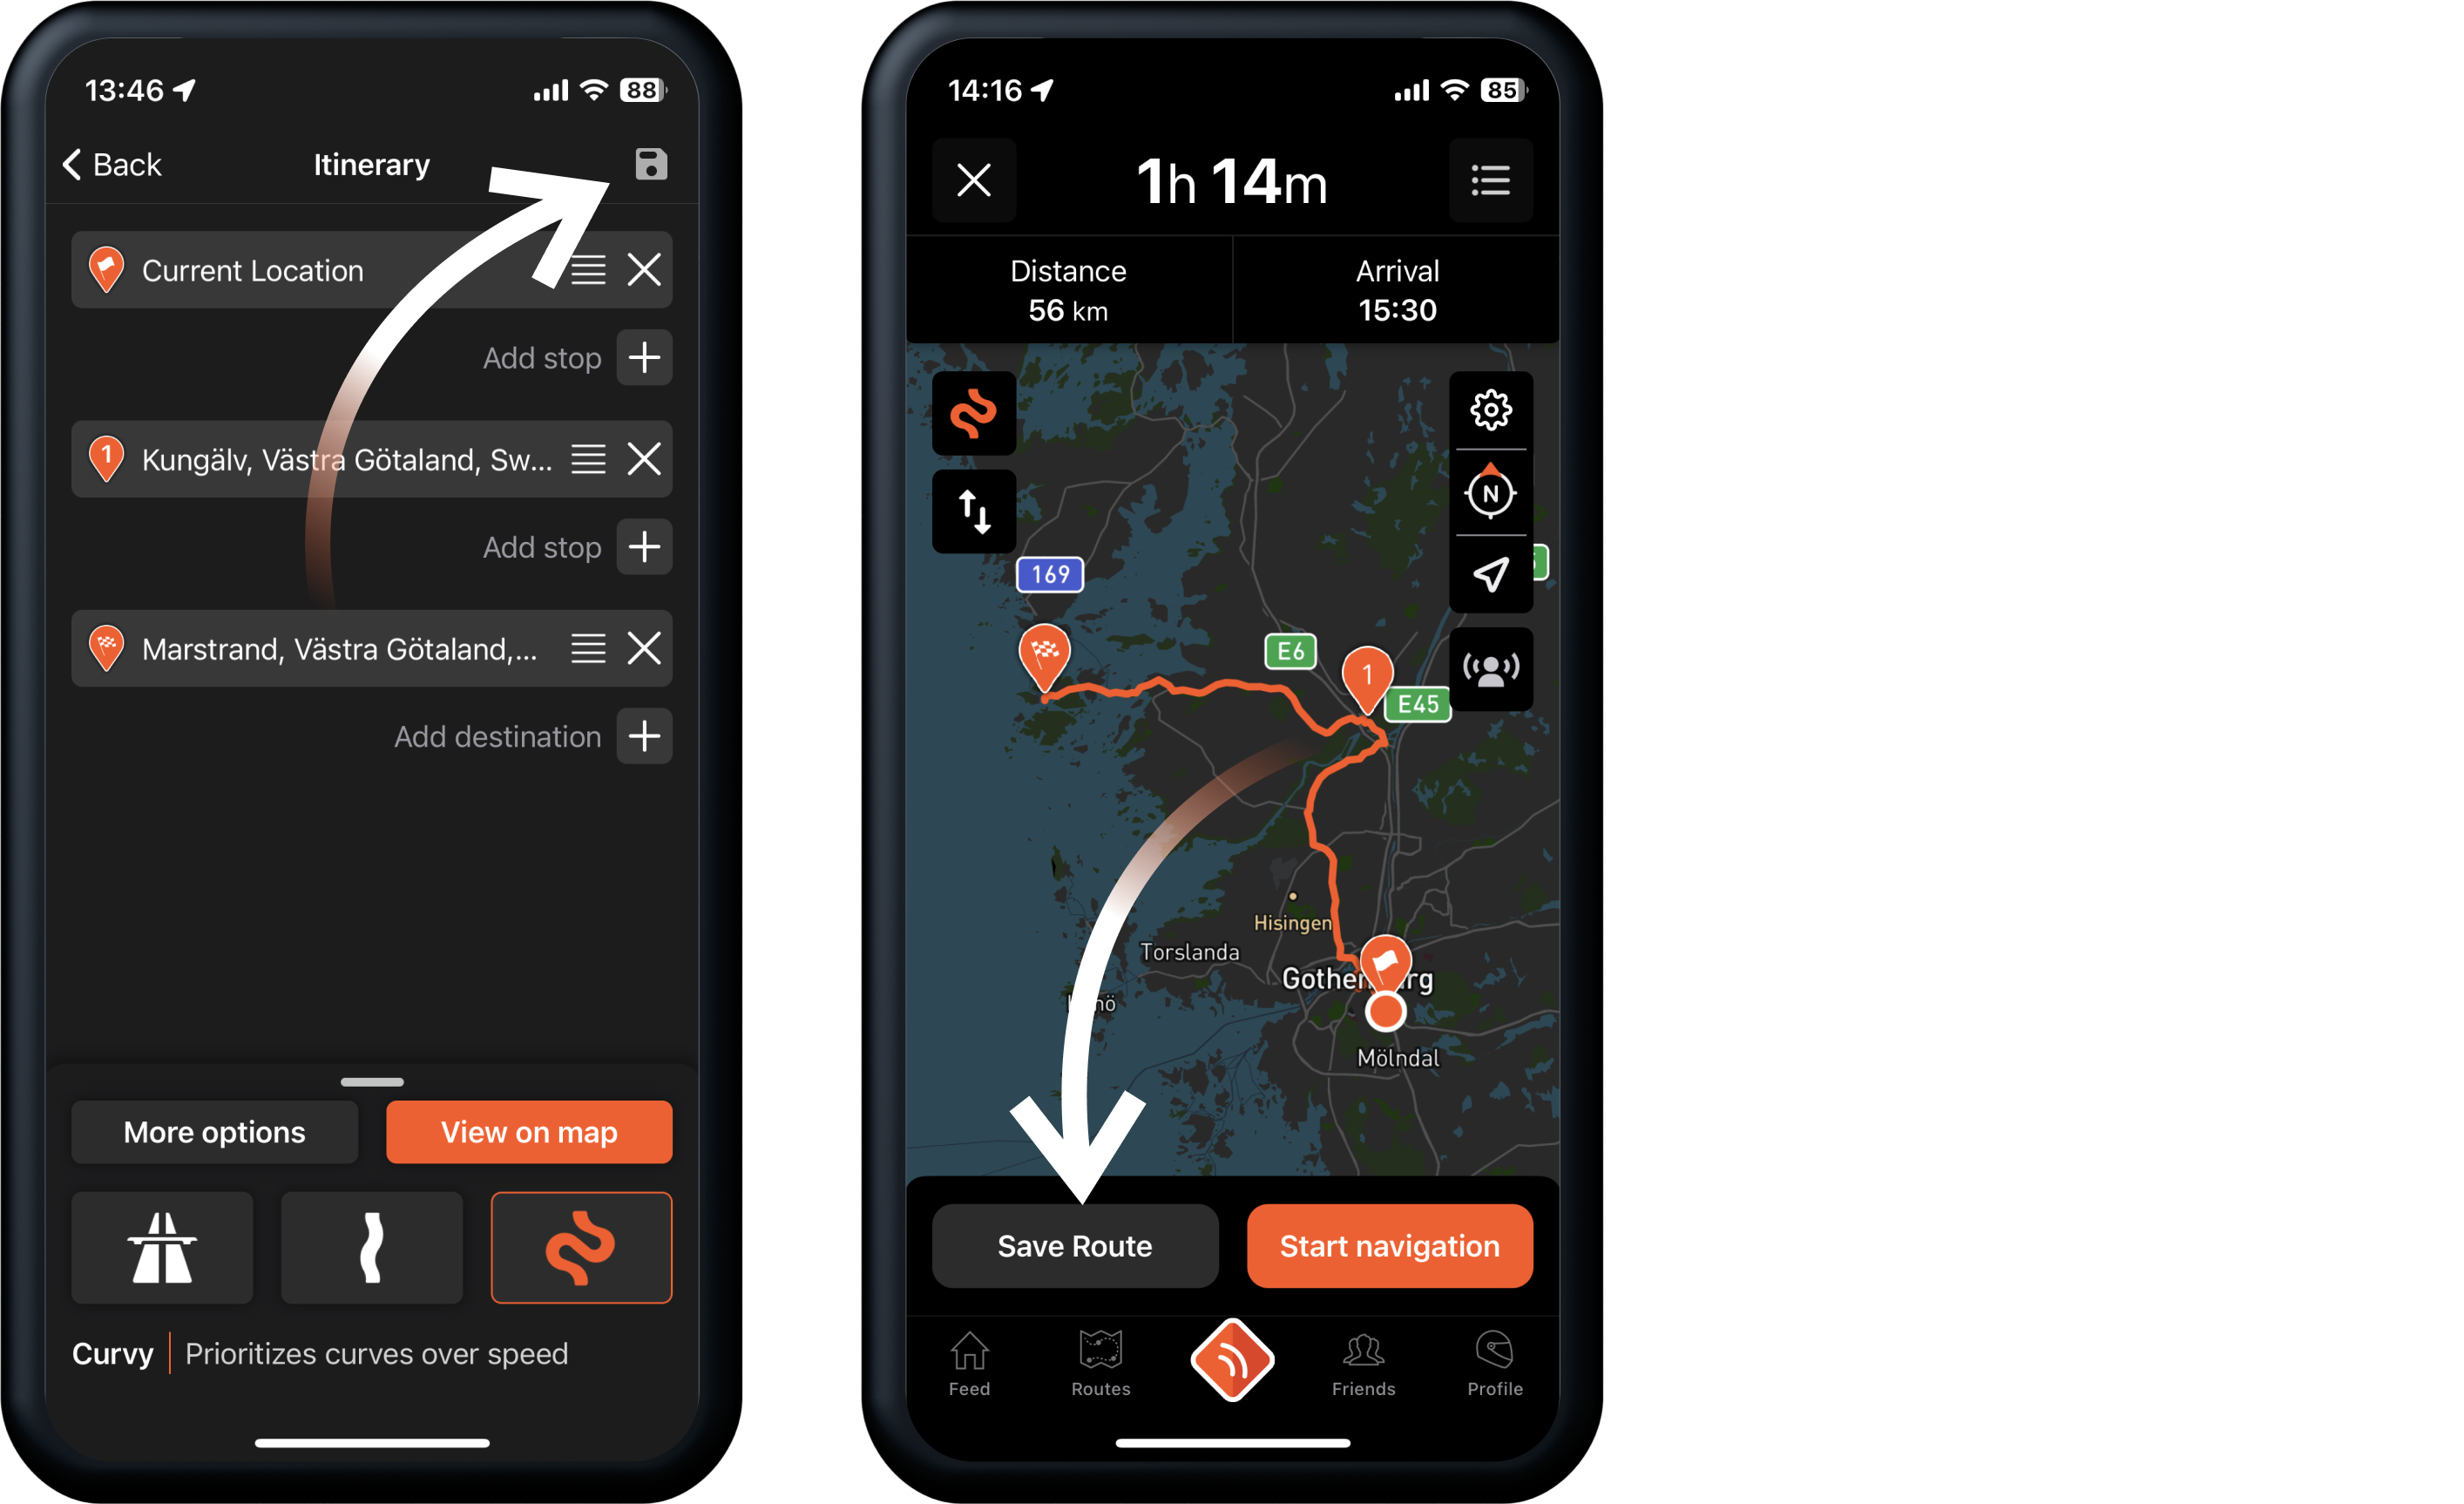
When you have a route with a start and end destination, a save icon will appear either:
- In the top right corner in the itinerary list.
- Next to the Start navigation button on the map.
Tapping either of these will open the Save Planned Route Screen.
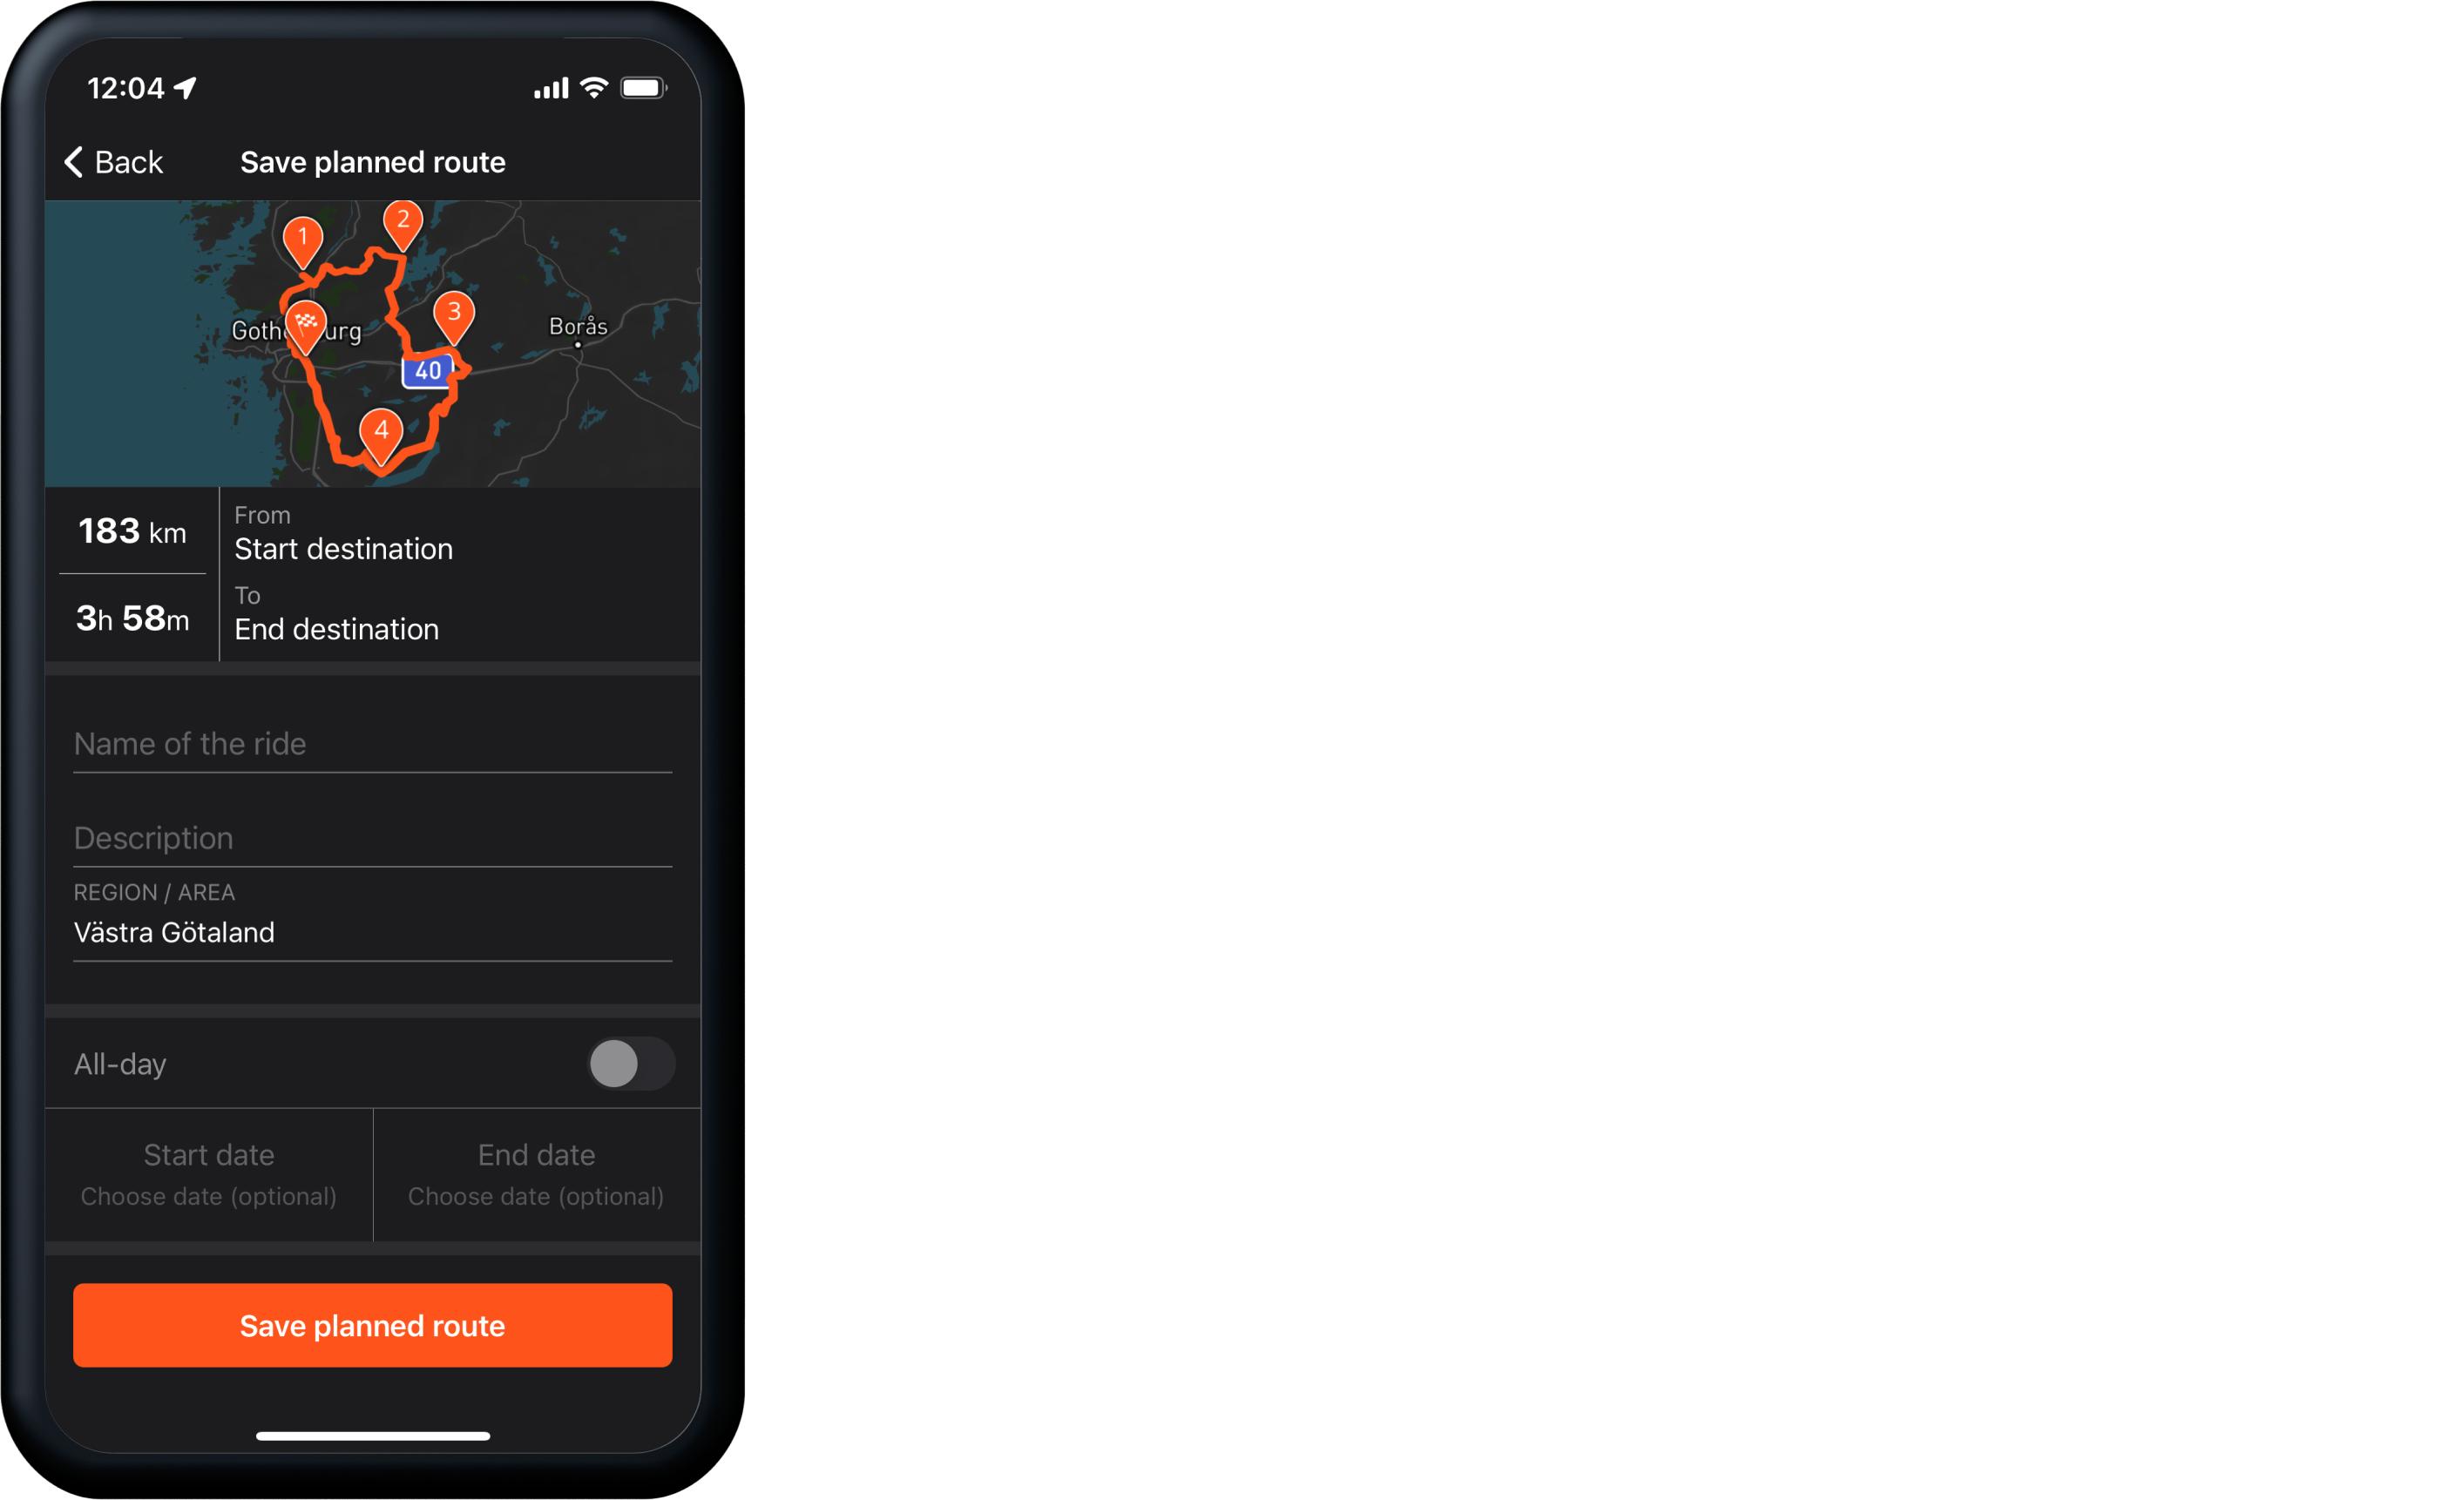
Here you can add information such as:
- Route name
- Route description
- Region/area (which is already set)
- Set a start and end date
When you are happy with the route, tap Save Planned Route.
Your planned route is now stored in your Planned Routes in your Profile Page, or in “My Planned” tab in the Routes Page.
How to edit a planned route
You can always revisit previously planned routes to edit them however you like.
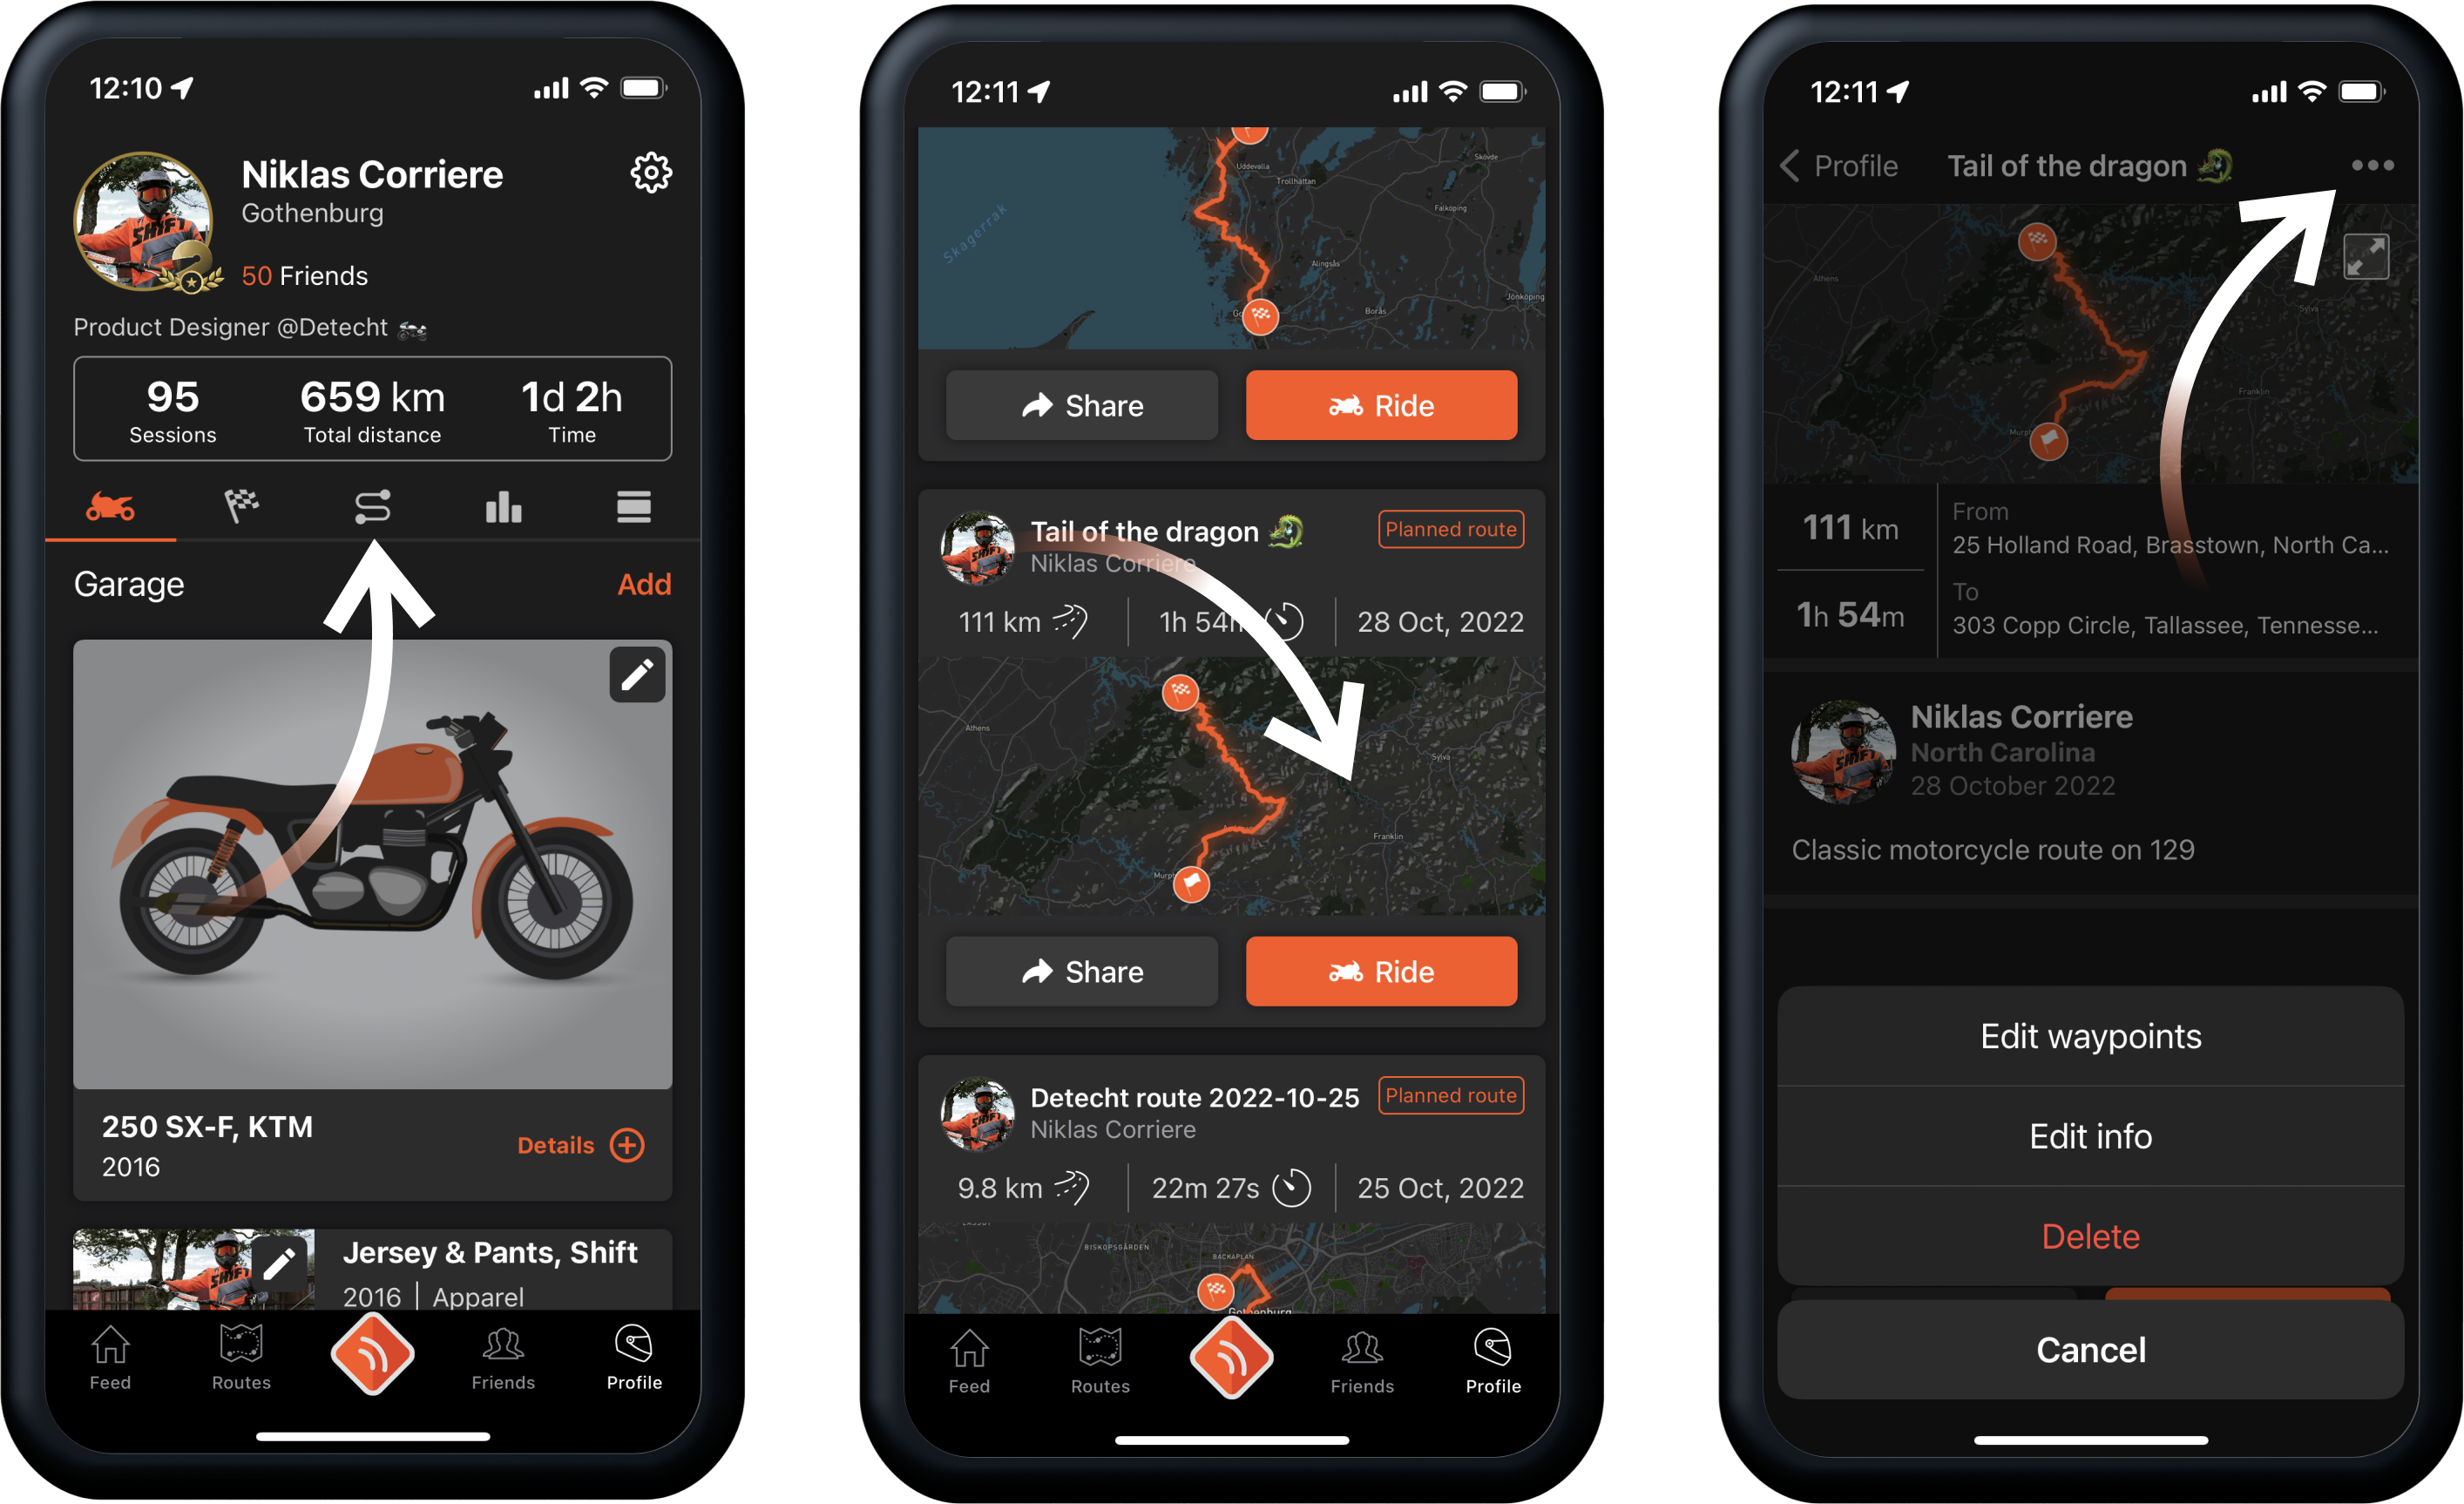
- In your profile page, go into the planned routes tab.
- Tap the route you want to edit.
- In the top right corner, tap the three dot icon.
This will give you 3 options:
- Edit waypoints - If you wish to alter the route
- Edit info - If you want to change route info such as description or name
- Delete - If you no longer wish to keep it.

